As a Jeep owner, the call of adventure is amplified by the freedom and capability these vehicles offer. Enhancing your Jeep’s performance and aesthetics often involves installing lift kits. Elevating your ride not only adds to its rugged appeal but also expands its off-road capabilities.
However, diving into the world of lift kits installation can be daunting for the uninitiated. Fear not, as this comprehensive guide is crafted to walk Jeep owners through the process, ensuring a smooth and successful lift kit installation.
Understanding Lift Kits: A Primer for Jeep Aficionados
Before delving into the installation process, it’s crucial to comprehend the different types of lift kits available for your Jeep. Suspension lifts, body lifts, and leveling kits each serve distinct purposes.
Suspension lifts offer increased ground clearance by replacing suspension components, while body lifts raise the vehicle’s body off the frame, allowing for larger tires. Leveling kits, on the other hand, elevate the front of the vehicle to match the rear, rectifying any factory rake. Assessing your needs and understanding the functionalities of these kits is the first step towards an informed decision.
Step-by-Step Installation Guide: Mastering the Art of Elevating Your Jeep
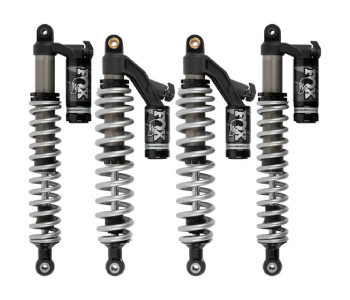
- Gather the Essentials: Before beginning the installation, ensure you have the necessary tools and components. Quality lift kits typically include components like shocks, springs, and hardware. Essential tools may range from wrenches and sockets to jack stands and a hydraulic floor jack. Adhering to the manufacturer’s instructions and safety guidelines is paramount throughout the process.
- Preparation and Safety Measures: Begin by parking the Jeep on a level surface and securing it with wheel chocks. Safety should be the priority—disconnect the battery, loosen lug nuts, and lift the vehicle using the appropriate jack points. Safeguard yourself by wearing protective gear such as gloves and eye protection.
Securing the Workspace:
- Level Ground and Wheel Chocks: Park your Jeep on a level surface to ensure stability during the installation. Utilize wheel chocks behind and in front of the wheels opposite the ones you’re working on. This prevents any accidental rolling and maintains the vehicle’s position.
- Battery Disconnection: Begin by disconnecting the battery to avoid any electrical mishaps. This precaution prevents accidental short-circuiting and ensures a safer environment to work on your Jeep.
- Gloves: Wear durable, well-fitting gloves to shield your hands from sharp edges, potential cuts, or dirt accumulation. Opt for gloves with good dexterity to handle tools effectively without compromising protection.
- Eye Protection: Employ safety glasses or goggles to shield your eyes from debris, dust, or any unforeseen particles that might dislodge during the installation process.
- Loosening Lug Nuts: Before lifting the vehicle, slightly loosen the lug nuts of the wheels you’ll be working on. This preliminary step eases the process of removing the wheels once the vehicle is elevated.
- Appropriate Jack Points: Identify and utilize the manufacturer-recommended jack points to lift your Jeep. Using the wrong points can damage the vehicle’s frame or undercarriage. A hydraulic floor jack is ideal for lifting, providing stability and elevation.
- Follow Instructions: Refer to the specific guidelines outlined in the lift kit manufacturer’s instructions. Each Jeep model might have nuances in the installation process, so adhering strictly to these guidelines is crucial.
Prioritizing safety not only ensures a smoother installation process but also minimizes the risk of accidents or injury. By meticulously following these safety protocols, you create an environment conducive to efficiently installing lift kits on your Jeep while safeguarding your well-being.
Remember, when in doubt or faced with uncertainties during the installation process, consulting a professional or seeking assistance from experienced individuals can further enhance safety and ensure a successful lift kit installation.
Installation Process
Follow the manufacturer’s instructions meticulously, starting with the removal of wheels, shocks, and springs. Install the new components according to the provided guidelines, ensuring precise torque specifications. Double-check all connections and fittings before lowering the vehicle and reinstalling the wheels.
Post-Installation Checks
Once the lift kit is installed, perform thorough inspections. Ensure proper alignment, check for any leaks, and test the functionality of your Jeep’s suspension. Take your vehicle for a short test drive, paying close attention to any unusual sounds or handling issues.
MW4 Outfitters: Your Trusted Partner in Jeep Upgrades
When it comes to sourcing high-quality lift kits  and accessories for your Jeep, MW4 Outfitters stands as a beacon of reliability and expertise. Located in Humble, TX, MW4 Outfitters boasts an extensive inventory of premium-grade lift kits, catering to various Jeep models. Our commitment to customer satisfaction is matched by our knowledgeable staff, offering expert guidance and support throughout your upgrade journey.
With MW4 Outfitters, Jeep enthusiasts gain access to top-notch products, ensuring durability, performance, and a seamless installation experience. We provide superior service and genuine parts, which makes us the go-to destination for all your off-road needs. Elevate your Jeep with confidence, knowing MW4 Outfitters has your back.
 2006 Rotary Drive
